Introduction
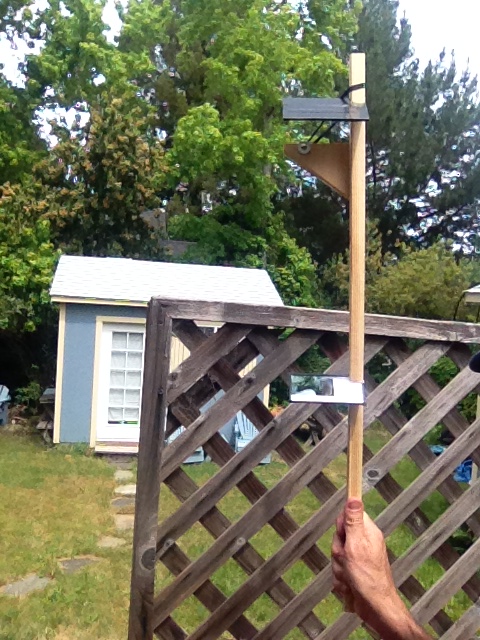
Sometimes the things you want to see or photograph the most
are the ones with the largest crowds in front of you!
This project allows you to:- See above the heads of people in front of you.
- Quickly mount your cell phone camera at the top
- Film for long periods of time without shaking or arm fatigue
- Maintain proper framing of your video or photographs while the camera is over your head
WARNINGS:
* Follow all safety procedures when
using power tools, including eye protection.
* The edges of the glass
mirrors are sharp - handle with care and tape them up.
* Caution when using outdoors:
the Sun can reflect into your eyes or the eyes of
others.
Buying the materials
I bought all materials at my local
hardware store for about $10. Have them cut the
mirror glass for you, as they have the proper tools and
experience to do small pieces without damage.
Sometimes there is a minimum charge or a charge to do the
cutting. Of course, if you have a table saw and some
wooden trim lying around you can cut the wood from
stock. I found that 3/4" square shape is comfortable
in the hand and provides a good sense of grip.
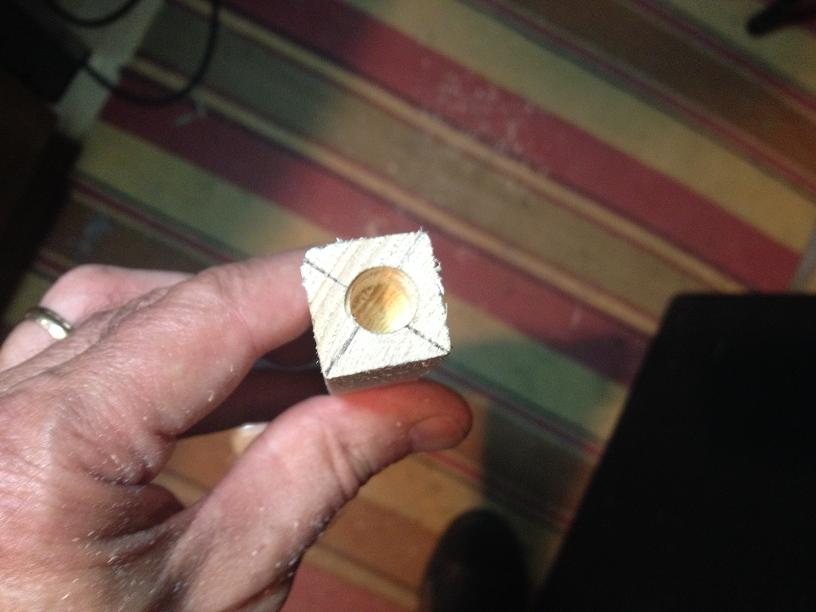
Getting a nice 45 degree cut
Despite the settings on table saws, if
you just dial in a 45 degree setting and cut into the wood
the mirror doesn't always line up correctly with the
shaft. This is due to differences in the thickness
of the cut versus the thickness of the mirror and
misalignment of the dials or warp of the wood. So it
is best to start with 3' section of the wood and make an
initial cut and test it.
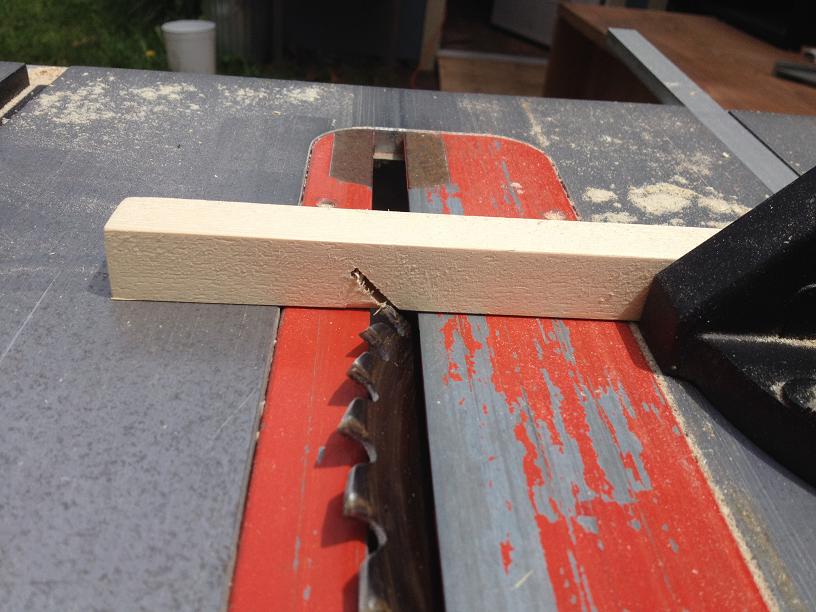
Line up the wooden piece with the saw
and make a cut just halfway through the wood (about 3/8"
deep). Make this first cut near one end of the wood,
as it will be discarded after it has been aligned, and you
may have to make 1 or two more cuts before getting it
right. Insert the mirror into the cut as
shown. Hold the mirror in place while you raise the
wood and the mirror up to your eyes. When the wood
is perpendicular you should be able to look into the
mirror and see the wooden pole as it rises in the
air. If you can't see the pole rise then adjust the
mirror and make a mark about how to adjust the next cut to
make a better alignment.
Making the cuts

Cut off the section of the pole used to make your test cuts. Then cut the remaining piece into a 30" length. Make the top angled cut about 3" down from the top of the wooden pole. Make the bottom angled cut 15" below that, leaving about 12" of pole below the mirror. The amount of pole below the bottom mirror determines where your arm will naturally be resting while the mirror is in front of your eyes. You may trim some of the bottom part off to suit your body size. Sand the corners of all of the wooden pieces so that they are smooth to the touch (not too much).
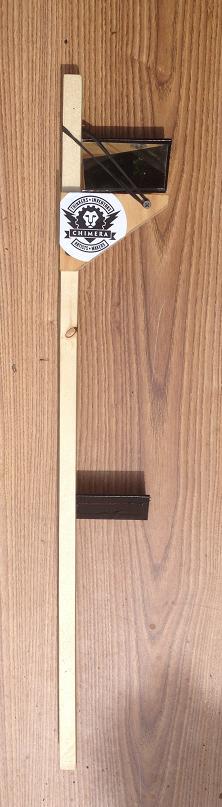
Mounting the mirrors
Insert the smaller mirror (2" x 4")
into the bottom cut so that one edge is flush with the
edge of the wood, extending out to the left side of the
pole. (If you are left-handed, you might experiment
with having the mirror extend to the right side of the
pole). You might have to use a bit of paper or duct
tape shim to get a good fit, but once it seems to fit
snugly, you can glue it into place. I used a tube of
Goop glue.
Insert the larger mirror (2 1/2" x 4
1/2") into the top cut so that one edge is flush with the
edge of the wood, extending out to the left side of the
pole (unless you are doing the left-handed version).
Glue it into place. Set the assembly aside for the
glue to dry, making sure that the mirrors are all lined up
properly.
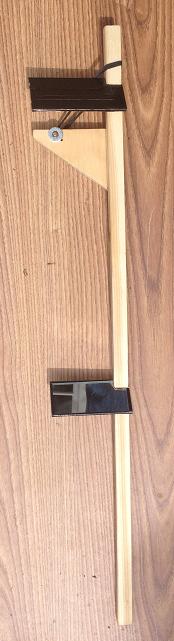
Making the Cell Phone mount
You will need a piece of 1/2" plywood
or other scrap wood to make the cell phone mount.
Basically anything that can start out as a 3" x 5 1/2"
piece of wood is fine. Cut the wood to a 3" x
5 1/2" rectangle.
Drill two pilot holes into the 1/2"
ply about 3/8" in from one end and about 2" apart.
These will be used to screw the plywood piece to the
pole. The top of the plywood should line up with the
bottom edge of the top (larger) mirror so that the mirror
can reflect the entire cell-phone width. You can
line this up by hand, holding the plywood in place while
checking the view from the bottom mirror using the
periscope. Make a pencil line where you want to
place the plywood.
Before attaching the plywood, you
might want to make an angled cut to reduce some of the
weight of the plywood and make a more pleasing shape (see
picture above).
Screw the 1" drywall screws into your
pilot holes. Make sure that the plywood is attached
to the Front of the pole (not the side with the mirrors
sticking out).
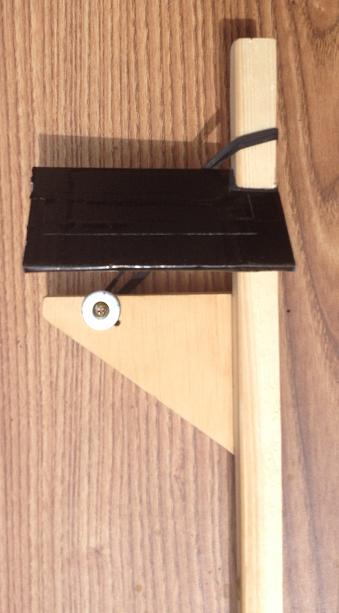
On the back side of the plywood, screw
in a 3/4" screw and washer such the the washer extends
above the top of the plywood. In the picture above
I've used a small piece of plastic instead of a
washer. This helps the cell-phone stay flush with
the front surface of the pole.
On the front side of the plywood,
screw in a 3/4" screw near the outer edge (not directly
aligned with the back side screw you just
attached!). This will be for the rubber band to
attach to.
The rubber band will wrap around the
top of the pole and stretch across this screw to hold the
cell phone in place. Screw the other 3/4" screw at
the end of the cell phone mount as shown.
Test the fit
Mount your cell phone on the cell
phone mount using the rubber band. You might have to
adjust the position of things so that you can still reach
all of the buttons that you need to access for photography
and video without removing the phone from the mount.
As you look into the bottom mirror at
the cell phone (or without the cell phone into the view
out of the top mirror), take note of where you naturally
want to hold the pole so that it is comfortable. You
can cut off any excess wood from the pole below this
point.
Take your Sugru or duct tape
and carefully and cleanly cover the exposed edges of the
mirror glass so that nothing will get cut. The Sugru
should be left to dry fully before the periscope is
used. If you use duct tape take a sharp razor blade
and trim the edges for a clean look.
OPTIONAL 1/4" Threaded Insert:
At the bottom end of the long pole, drill a 7/16" hole,
centered on the shaft. Screw in the 1/4" x 20 insert
into this hole. This will allow the periscope to be
mounted to a tripod or monopod, if desired.
Last Update: 15 May 2014
Parts:
(1) 3 foot length of 3/4" x 3/4" wooden trim(1) 2" x 4" 1/8" mirror glass
(1) 2 1/4" x 5" 1/8" mirror glass
(2) 1" drywall screws
(2) 1/2" flat head screws
(1) package of Sugru or Duct Tape
(1) thick rubber band
(1) piece of 120-grit sand paper
(1) tube Goop glue
Optional:
(1) 1/4"-20 Female insert
Tools:
Table saw (or hand saw, carpentry square and vice)Drill with 1/8" twist bit
Sandpaper
Pencil
Construction Time:
About 1 hour.Alternatives:
You can probably use other wooden poles or dowels, or even a section of PVC pipe. But a square shape helps to line up the 45 degree cuts and helps hold the cell phone firmly to the shaft.There are some plastic mirrors available which are very light weight and work fine, but they will tend to scratch and are harder to clean than real glass.